You have noticed that it's slightly frustrating to try to analytic your Google Analytics when a large portion of your hits come from yourself. To fix this you can setup an IP filter for your Google Analytics so that Analytics stop counting website visits with your IP address. Unfortunately, your IP may change from time to time, so you may need to adjust the filter when needed.
Below are instructions on how to create a Google Analytics IP Filter.
How to create a Google Analytics IP Filter
- Sign into your Google Analytics account.
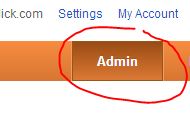
- Click on the 'Asdmin' button at the top right of the screen.

- Click on the website Anaytics account that you want to make an IP filter for.
- Click on the 'filters' tab.
- Click the '+New Filter' button.
- Type in some title in the 'Filter Name' field. example: "my ip filter'.
- Set the three fields to 'Exclude', 'traffic from the IP addresses', 'that are equal to'.
- Next enter your IP address in the 'IP address' field.
Note: if you don't know your IP address you can find out what it is by using the 2slick.com IP detect page. - Next, select the website profile you want to apply this filter to from the 'Apply Filter to Profiles' box.
- Click the 'Add »' button. The website profile should have popped into the 'Selected profiles' box.
- Click the 'Save' button.
That's it, you've created an IP filter and for now on, that IP address (your visits) won't be counted on your Google Analytics anymore.


Before you post, please prove you are sentient.
Wait! The answer you gave wasn't the one we were looking for. Try another.
What color is the sky on a sunny day?