How to link a photo to a website so that when a visitor clicks on a particular image, they're taken to another website or web page. This is fairly easy to do using HTML and will work in most blogging programs that allow you to use html. To complete this tutorial you will need to upload your image to an image hosting website. Note the URL the image hosting website gives you for your hosted image. Below are instructions on how to create the HTML snippet and how to apply it to WordPress, Blogger and Tumblr.
The HTML snippet used to link an image to a website
Here is the code snippet:
| Javascript | | copy code | | ? |
| 1 | |
| 2 | <a href="http://2slick.com" target="_blank"><img src="http://2slick.com/web/wp-content/uploads/2011/06/logo3.png" alt="" /></a> |
| 3 |
Here is what the code snippet looks like on a web page:

Note: Notice that when you click on the logo image, you are directed to the home page of 2slick.com.
To change the code snippet image, and the web page it redirects you do, you will need to change two things in the snippet. Change the http://2slick.com/web/wp-content/uploads/2011/06/logo3.png URL to you image URL. This will replace the 2slick.com logo with your image. Next change the http://2slick.com URL to the URL you want visitors to be forwarded to, once they click your image. That's it, your modified code snippet is ready to insert into any web page that accepts HTML. Save your modified code snippet to a text document like Notepad.
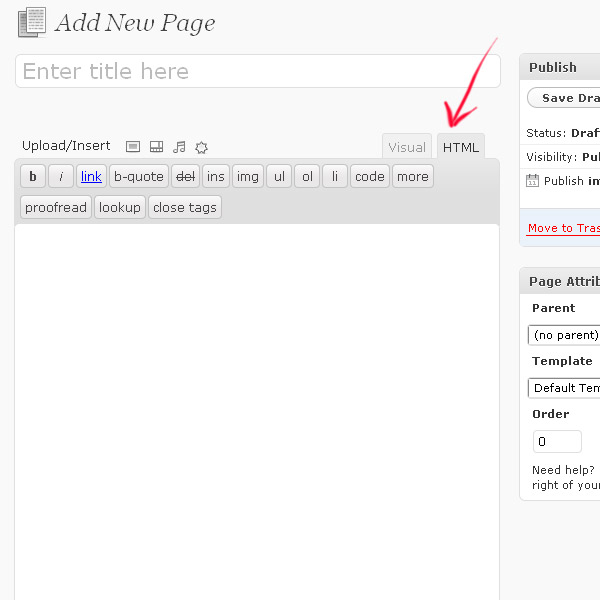
How to insert HTML into WordPress
Click on the HTML tab over the content area of any post or page to insert HTML markup.

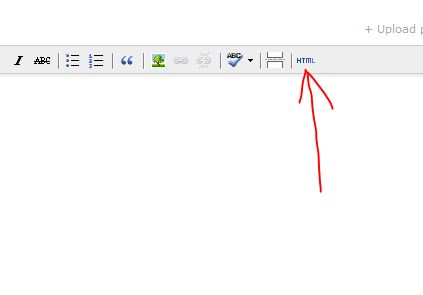
How to insert HTML into Blogger
Click the HTML tab while creating a post. Now you can insert HTML code into the post. Click the 'Compose' tab to view the html as it should display to visitors.

How to insert HTML into Tumblr
Click the 'Edit HTML source' button and a 'HTML Source Editor' popup window appears. Enter HTML code into the window and click the 'Update' button.


Before you post, please prove you are sentient.
Wait! The answer you gave wasn't the one we were looking for. Try another.
What color is a typical spring leaf?