In this tutorial I will show you how to upgrade WHMCS. I will be upgrading to WHMCS version 5.1. It's a good idea to backup your current files before you upload the new ones, just in case.
Backup current WHMCS database.
- Log into cPanel.
- Click on the 'myphpMyAdmin' icon.
- Click on the WHMCS database.
- Click on the 'Export' tab.
- Select 'SQL' as the export format and click the 'OK' button.
Get the backup file from WHMCS
- Log into your WHMCS account members area: http://www.whmcs.com/members.
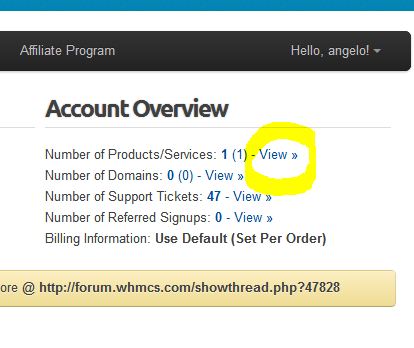
- Click on the 'View »' link for 'Number of Products/Services:' under the 'Account Overview' area.

- Click on the 'View Details' button for your WHMCS product.
- Click on the 'Downloads' tab.
- Click on the 'Download' link for the latest version of WHMCS.
- Unzip the file so you can upload it in the next step.
Set your Current version of WHMCS to maintenance mode
We will set our current version of WHMCS to maintenance mode so customers can't login to their account during the upgrade.
- Log into WHMCS.
- Click on 'General Setting' under the 'Setup' tab.
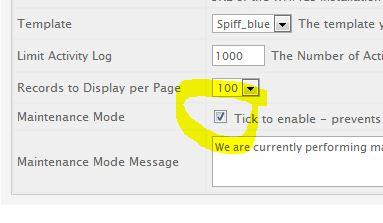
- Under the 'General' tab under the 'General Settings. check the 'Tick to enable - prevent client area access when enabled' check-box.

- Click the 'Save Changes' button.
Uploading the new version of WHMCS to replace the old version
- Log into your FTP account. In this example I'll be using Dreamweaver.
- Drag the contents of the WHMCS application into the directory of your old WHMCS application, sit back and let the upload process finish.
Note: Most web hosting re-sellers change the name of their admin folder for security reasons. If you changed your admin folder name, make sure you also change the admin folder of the upgrade filed to match, before you begin the upload process.
Log into your WHMCS program and it will guide you though the rest of the upgrade process.


Before you post, please prove you are sentient.
Wait! The answer you gave wasn't the one we were looking for. Try another.
What is 6 times 4?