Follow the steps below to change the nameservers for your domain name on your Godaddy.com account.
Change nameservers on Godaddy
- Log into your Godaddy.com account.
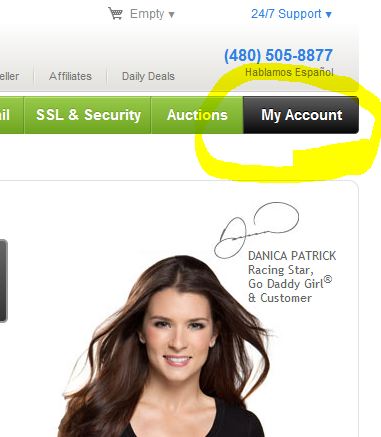
- Click the 'My Account' button.

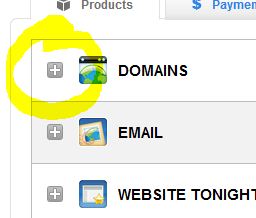
- Click the plus symbol next to the domains icon.

- A drop-down window will appear displaying all your registered domain names.
- Click the 'Launch' button next to the domain name you want to change the nameservers for.
- Make sure your domain is unlocked. If it's not, click the 'Manage' link next to the 'Locked' status.

- The 'Set Domain Locking' window will appear (Locking prevents unauthorized domain changes, including transfer to another registrar.).
If the status is set to locked, then uncheck the box. - Click the 'OK' button.
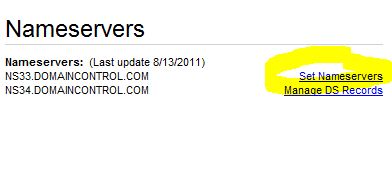
- Next click on the 'Set Nameservers' link near the bottom of the screen.

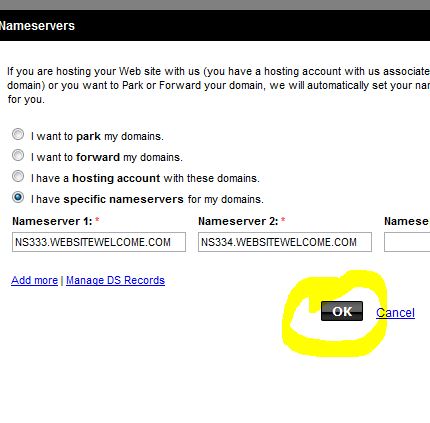
- Check the box 'I have specific nameservers for my domains.'.option.
- 'Nameserver 1' and 'Nameserver 2' will be populated with the current nameservers, delete them and input your new nameserver 1 and nameserver 2.
- Click the 'OK' button.

- Click the 'OK' button.
Note: Make sure to keep track of your email addresses set up on your current web hosting account. Once the domain propagates to the new web hosting, you will need to recreate the email addresses and adjust the settings in your email client program(s).


Before you post, please prove you are sentient.
Wait! The answer you gave wasn't the one we were looking for. Try another.
what is 6 + 4?