I will show you how to create a gallery in WordPress with just a few simple steps. It's recommended that your gallery images be saved in 'JPG' format under 1mb each.
Creating a gallery in WordPress
- Log into your WordPress admin.
- Click on 'Pages'.
- Enter a title for your page called 'Gallery'. You can name this gallery page anything you want.
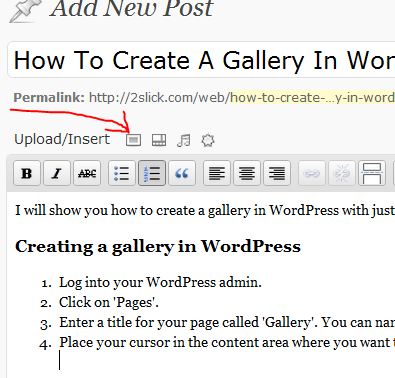
- Place your cursor in the content area where you want the gallery to appear, and click on the 'Add an Image' icon.

- Click the 'Select Files' button.
- Navigate to the directory on your computer where you have the images saved that you want to use for your galler, select them and press the 'Open' button.
Note: you can hold down the 'CRTL' key while selecting you images to select multiple images at one. - After WordPress uploads all the images for your gallery, click the 'Save All Changes' button.
- Click the 'Insert Gallery' button.
- Your gallery should now be placed in your content area and look like this (if you have the 'visual tab' selected).

If you have the 'HTML' tab selected, your gallery will appear as shortcode
Javascript | copy code | ? 1 [gallery link="file" columns="4"]
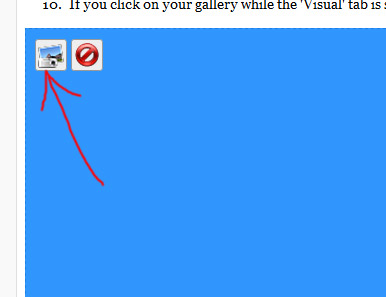
2 3 - If you click on your gallery while the 'Visual' tab is selected, the 'Edit Gallery' icon will appear.

You can click the 'Edit Gallery' icon to make changes to your gallery. How to order WordPress gallery - Click the 'Update' button to save your WordPress gallery page.


Before you post, please prove you are sentient.
Wait! The answer you gave wasn't the one we were looking for. Try another.
What is melted ice?