Create a signature inWindows Live Mail
- Open the Windows Live Mail program.
- Click on the 'Home' tab at the top of the screen.
- Click the 'Email message' icon.
- Enter the text you want to use for your email sig, in the message body.
Example:
Angelo Bonavera
425.729.3338
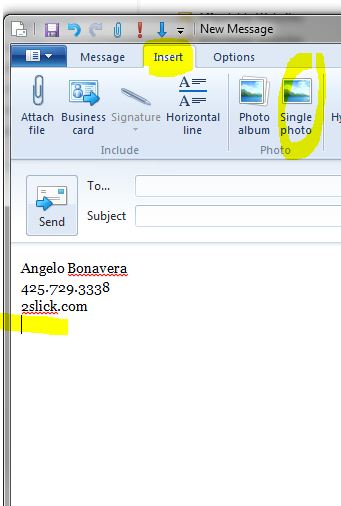
2slick.com - Place the cursor under the text where you want your logo to appear.
- Click the 'Insert' tab at the top of the message window.
- Click the 'Single photo' icon.
- Navigate to a directory on your computer where the email signature logo is.
- Click on the logo, and press the 'Open' button. Notice how the logo is inserted into the message where the cursor was.
- Click the blue button at the top of the screen and click 'Save as file'.
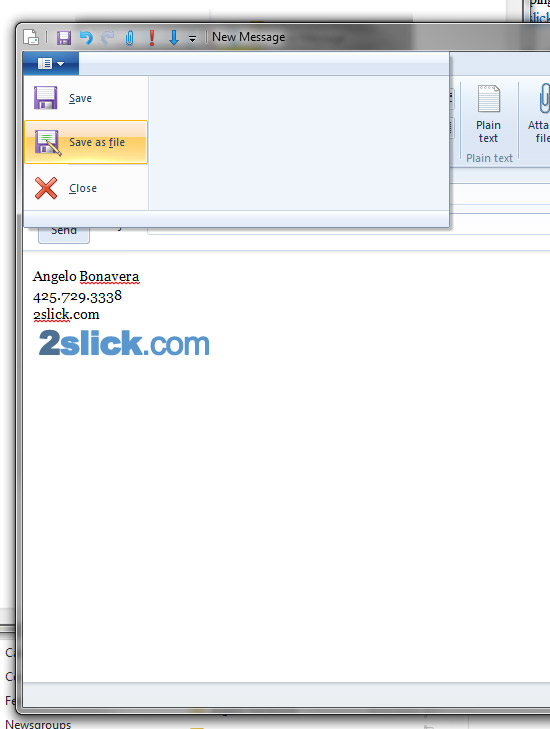
- Save the file to your computer and make sure you set the 'Save as type:' option to 'HTML Files...'.
Now that we have a signing's, we're going to have to 'add the signature' to our Windows Live Mail program.
Adding a signature in Windows Live Mail
- Open Windows Live Mail.
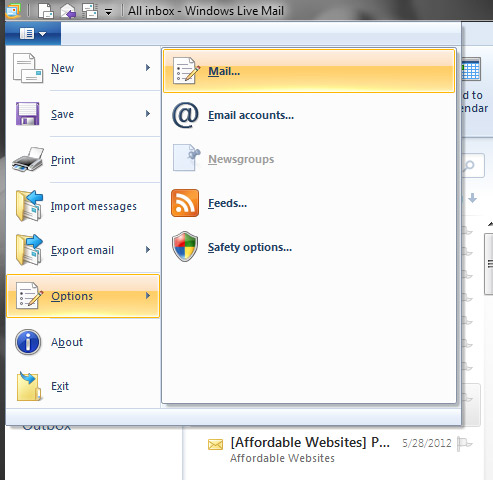
- Click the blue button in the top left of the window.
- Select 'Options'.
- Click on 'Mail...'.
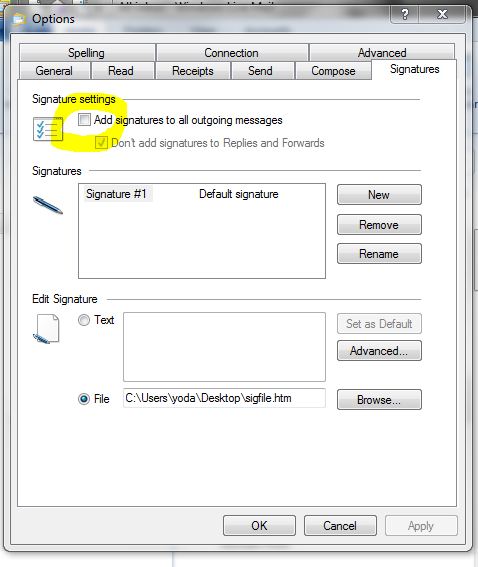
- The 'Options' window will popup. Click the 'Signatures' tab.
- Click the 'New' button.
- Check the 'File' bullet option.
- Click the 'Borwse...' button.
- Select 'HTML Files...' from the file type drop down menu.
- Navigate to a directory on your computer where you saved your email signature and select it.
- Click the 'Open' button.
- If you want this email signature to appear on all emails by default, click the 'Add signatures to all outgoing messages' bullet option.
- Click the 'OK' button.




Before you post, please prove you are sentient.
Wait! The answer you gave wasn't the one we were looking for. Try another.
What color is fresh snow?